Motorcycle for Animals Zones and Map Guide
Travel Animal Zones 1–8 by motorcycle, plan egg steal routes, and verify speed gates yourself—no invented biome names.
Zones are where Motorcycle for Animals turns trained speed into stolen eggs. Your plot builds power; the open world spends it. This guide explains how community tools talk about Animal Zones 1–8, how to travel by motorcycle, how to plan steal routes that actually return home, and why this wiki will not invent official biome names or numeric speed gates.
Pair this page with Treadmill and Speed for the training that unlocks farther bands, Eggs and Hatching for what to do with stolen eggs, Auras for mid-game ride polish, and How to Play for full-loop session goals. New accounts should finish Getting Started before chasing high zone numbers. Priority frameworks live on the Tier List.
What “zones” mean in public info
Best Animal Productions! has not published a confirmed official biome name list that this wiki can cite. What is widely referenced by community tools and script menus is a numbered band: Animal Zones 1–8, often with zone teleports in automation GUIs.
Treat that numbering as a community shorthand:
- Lower numbers generally imply earlier, lower-demand routes.
- Higher numbers generally imply higher speed demand and better egg opportunities.
- Labels inside third-party menus are unofficial.
- Exact official names, map lore titles, and published speed thresholds remain unverified here.
If a friend sends a fancy biome chart, compare it to your live client after every major patch. Trust what you can ride, not what a spreadsheet claims.
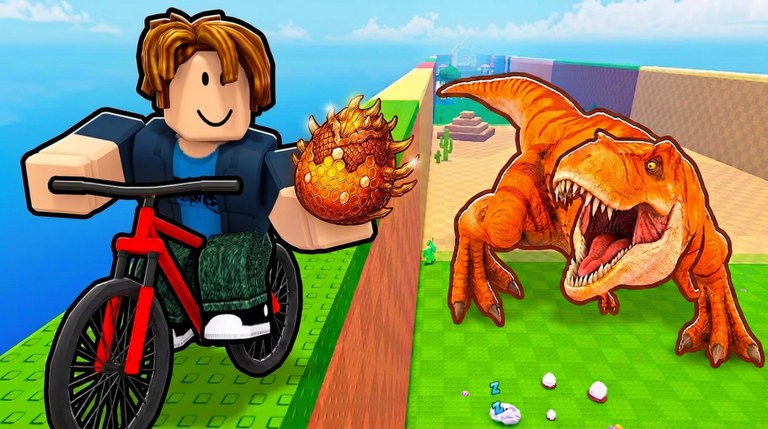
An illustrative gallery still from the experience may appear at /images/roblox-thumbnail-zones.jpg on this site. Use it as atmosphere only—it is not a labeled navigational map of all eight zones.
Travel is motorcycle-first
Zone travel in Motorcycle for Animals is built around the motorcycle. Walking the entire ladder is not the intended long-term plan. Speed you earn on the plot treadmill becomes useful when the bike can express it on route.
Practical travel rules:
- Train on the plot until nearby loops feel controlled (Treadmill and Speed).
- Buy the minimum motorcycle steps that make the next band rideable (Motorcycle and Aura Priority).
- Add auras only after access and plot capacity are already fine.
- Leave the plot with a return plan, not a sightseeing wishlist.
- Re-test after patches listed under Updates—gates can shift even when menus still say “Zone 5.”
Speed gates are unpublished in the verified facts for this wiki. Community rumors will invent numbers. Your method should be experimental: train, attempt the next farther route with a small egg goal, retreat if the run feels unsafe, then train again.
Field method for unlocking the next band
Because we will not fabricate thresholds, use this loop:
- Baseline — Record the highest zone band you can round-trip while still placing eggs at home.
- Train — Spend a focused treadmill block plus any cheap speed upgrade you can afford.
- Probe — Ride one step farther with a tiny steal goal (often one or two eggs).
- Judge — Stable arrival and return? Promote that band to your new baseline. Unstable? Retreat and train.
- Convert — Only after a stable probe do you farm that band for volume.
This method keeps you honest when script teleports or friend boosts make a zone look “free” for one lucky run.
Egg steal routes that respect capacity
Zones exist to feed the egg economy. A pretty ride that returns nothing placeable is a failed route. Anchor every trip to Eggs and Hatching logistics:
Recommended route shape
- Train on the plot if the target band still feels shaky.
- Count free egg slots before you leave.
- Ride nearby (or to the farthest band you can already clear) sized to those slots.
- Steal only what you can place.
- Return without greed detours once the slot budget is filled.
- Place and hatch immediately so animals start earning offline Cash.
- Review Animal Index gaps if collection is a goal, then decide whether the next ride goes wider or stays for volume.
Why “nearby first” beats hero runs
New players often aim for the highest number someone mentioned in chat. That creates empty inventories, failed returns, and wasted Cash on panic upgrades. A short successful loop on a lower band compounds faster than a failed expedition to Zone 8.
Size the route to:
- Current motorcycle comfort
- Free plot capacity
- Session length (ten-minute logins should not start marathon map tours)
How to Play session templates apply directly here: short sessions stay local; long sessions may probe one band farther after two clean baselines.
Zones, Index hunting, and offline cash
Higher reachable bands increase how many distinct egg sources you can sample, which helps Animal Index coverage over time—including chances at Mythic, Secret, and rare sizes when they appear. Exact drop tables remain unpublished; zone access simply buys more honest attempts.
Remember the conversion chain:
- Zones → stolen eggs
- Plot → placed and hatched animals
- Animals → offline Cash + Index progress
If you unlock a new band but leave eggs unplaced, you gained tourism, not progression. If you farm one easy band forever with a full Index drought, change routes once speed allows instead of blaming “bad luck” alone.
Script zone teleports (warning, not a guide step)
Community scripts often advertise Animal Zones 1–8 teleports and auto-farm hooks. Those menus are why the 1–8 shorthand is so common—but using executors violates Roblox Terms of Use and can ban accounts. This zones guide teaches manual motorcycle travel and honest probing. Read Scripts only for risk context; do not treat zone TPs as the intended way to learn the map.
Spending Cash for map progress
When the map feels blocked, spend in this order unless a patch changes economy balance:
- Codes redemption for free Cash
- Treadmill tiers / multipliers that raise baseline speed
- Motorcycle steps required for the next comfortable band
- Plot capacity if returns already overflow slots
- Auras for smoother clears on bands you already access
Cross-check with the Tier List when multiple upgrades claim to be “best.” Your bottleneck is personal: a player who cannot reach Zone 3 does not need aura polish first.
Session goals for zone players
Short session
Codes, hatch ready eggs, brief treadmill, one nearby steal loop sized to free slots, logout with animals earning.
Medium session
Baseline loop, optional one-band probe, place/hatch, then buy the upgrade that would have made the probe easier.
Long session
Alternate training with volume farming on your stable band. Probe farther only after two clean successes. End by parking Cash into speed or capacity—not into unrelated Shop noise—and confirm the plot is working offline.
Troubleshooting map frustration
- Cannot enter a higher band: under-trained or under-biked—return to Treadmill and Speed and Motorcycle and Aura Priority.
- Enter but cannot return safely: your probe was too ambitious; drop a band and rebuild baseline.
- Eggs stolen but useless: placement/capacity failure—fix Eggs and Hatching.
- Relying on script TPs to “learn” zones: you are not learning travel requirements; switch to manual probes on an account you are willing to risk, or skip scripts entirely.
- No official names in this guide: intentional. We refuse invented biome lists.
Related reading
- Treadmill and Speed — unlock farther bands
- Eggs and Hatching — convert steals into animals
- Auras — polish after access exists
- How to Play — loop and session planning
- Getting Started — first successful cycle
- Tier List — spend and target priorities
- Scripts — ToS warnings around zone teleports
- Guides Hub — full walkthrough index
Ride with a slot budget, verify gates in your own client, and let Animal Zones 1–8 become a checklist you earn—not a rumor list you memorize. That is how map progress stays real in Motorcycle for Animals.
Frequently Asked Questions
Quick answers about codes, animals, motorcycles, and progression.
How many zones are there?
Community tools and script menus commonly reference Animal Zones 1–8. Exact official biome names and numeric speed gates are not published in the facts used here—verify access in-game.
How do I travel between zones?
Travel by motorcycle after training speed on your plot treadmill. Raise bike and treadmill power until the next band is a stable round trip, then farm it.
What is a good egg steal route?
Train if needed, count free plot slots, ride a nearby clearable band, steal only what you can place, return, then place and hatch immediately.
Why doesn’t this page list official biome names?
Official named biomes are not confirmed for this wiki. We use the community Animal Zones 1–8 shorthand and refuse invented map labels.
Are script zone teleports safe?
No. Third-party teleports violate Roblox Terms of Use and risk bans. This guide assumes manual motorcycle travel; see the Scripts hub for warnings only.
Which guide helps if I cannot reach higher zones?
Open Treadmill and Speed, then Motorcycle and Aura Priority. Return here once probes feel stable enough to plan steal routes.